


Key Highlights
- A beginner-friendly DTF printing for beginners glossary is a summary of printing concepts, making it easier for small brands to produce custom apparel that is both vibrant and professional at a low cost.
- DTF printing terminology can be applied to various materials including cotton, polyester, blends, and dark garments, thus guaranteeing strong and durable results.
- The basic materials such as PET film, powder, curing, and heat pressing have a positive impact on the quality and stability of the printed image.
- The pathways for DTF drawing where both novice and skilled will be painfully slow but very eventually will end up at the same point of getting proficient, effective, and high-quality prints.
- The DTF printing method is economically viable, generates minimal waste, and is thereby perfect for the production of customized apparel in small batches or even large ones.
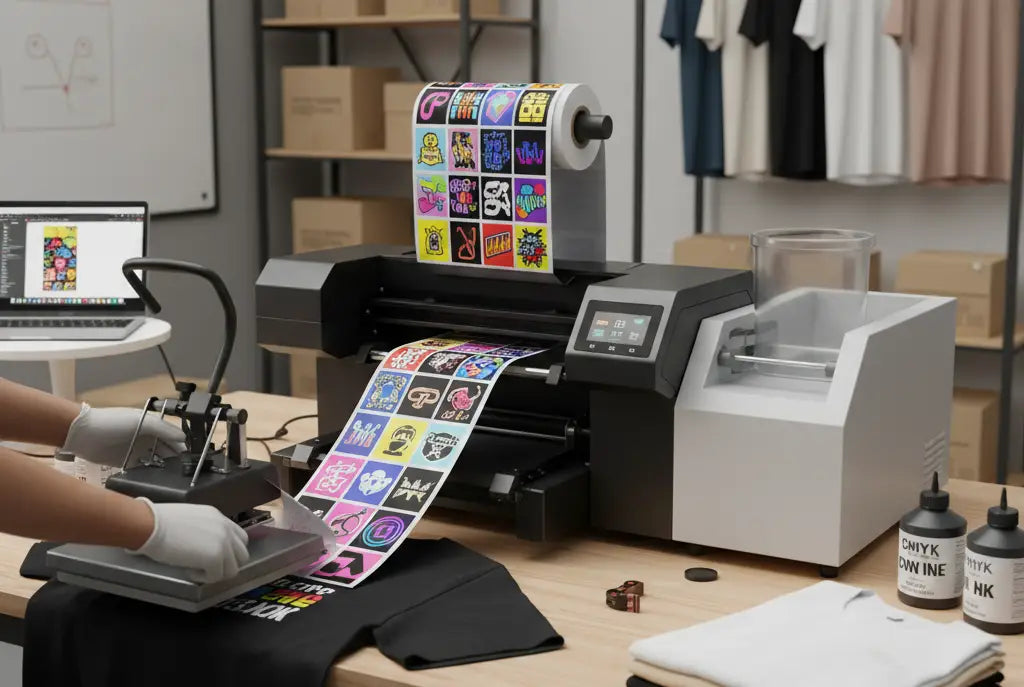
Direct-to-Film (DTF) printing is taking off as a go-to for custom clothes, like tees, hoodies, hats, and totes. Whether you're kicking off a business or just having fun printing, knowing the glossary terms can make a huge difference. If you’re looking into DTF printing for beginners, this DTF Printing glossary will make things simpler, so you can get started without a hitch.
DTF printing might seem techy at first, but once you get the hang of it, it’s pretty easy, versatile, and creative. This beginner DTF guide will help you print like a pro in no time through 20 DTF printing materials and concepts. So let’s get started!
1. Direct-to-Film (DTF) Printing
This is one of the most beginner-friendly DTF printing terminology essentials to understand.DTF printing helps you print full-color designs onto a special film, which can be later used to heat-press that design onto fabric. It works on cotton, polyester, blends, and even dark clothes. You get results that last and colors that withstand any harsh conditions. You do not need to pre-treat it like with DTG printing.
2. PET Film
PET (Polyethylene Terephthalate) is a strong, heat-proof film used for DTF prints. Your design sits here before you move it to a shirt with a heat press. PET films can be reused and come in glitter and non-glitter types.
3. Adhesive Powder (DTF Powder)
This powder is applied to new prints on PET film. When it heats up, it melts and sticks the ink to the fabric. This powder makes DTF prints stick really well and stay flexible, so they can handle washes and stretches. Using it properly is one of the most useful DTF printing tips you’ll pick up.
4. Heat Press
A heat press is a machine that heats up and presses consistently to move the DTF print onto fabric. It makes sure everything is even, the ink cures right, and the print lasts. How hot and how long you press depends on the fabric and how good you want the transfer to be. It’s a vital part of the DTF printing process that controls your final results.
5. Gang Sheet
A gang sheet is a PET film that can carry multiple designs on it. It saves material, keeps costs low, and speeds things up. It’s great for small businesses that need to print logos, team names, or shirt designs all at once. This is a practical example of efficient DTF printing techniques that help you get more done with less waste.
6. Curing
Curing is heating the printed DTF film so the ink and powder stick together well before you press it. This step sets the transfer, so the design doesn’t crack, fade, or peel when you put it on fabric. It’s one of those DTF printing equipment steps that guarantees lasting quality.
7. CMYK Ink
DTF printers use CMYK (Cyan, Magenta, Yellow, Black) inks for color printing. These four colors mix to make almost any shade you want. DTF inks are water-based and made for bright, soft prints on clothes that can stretch. This is part of the DTF basics for beginners, helping you understand how your designs get their color.
8. White Ink Layer
DTF printing needs a layer of white ink beneath the design to keep colors bright, especially on dark clothes. The white base makes the colors above stand out. It’s a key layer when learning DTF printing explained for beginners, since it impacts how vivid your prints look.
9. Rip Software (Raster Image Processor)
Rip software tells the printer how to print, layering colors and white ink correctly. It handles how accurate the colors are, how thick the ink is, and how lined up the print is. Once you know this part of the DTF transfer process, you’ll have cleaner, sharper designs.
10. Pre-Pressing
Before you put on a DTF transfer, pre-pressing means using a heat press to get wrinkles and moisture out of the garment. This helps it stick smoothly and lowers the risk of bubbles or peeling after you put the transfer on. It’s one of the best DTF printing for beginners to learn early.
11. Cold Peel
Cold peel means waiting for the DTF transfer to cool before peeling off the PET film. This lets the design really stick to the fabric, making it smoother and more durable. It’s one of the most common DTF printing materials steps that ensures long-lasting results.
12. Hot Peel
Hot peel is taking off the PET film right after pressing, while it’s still warm. This makes the print softer and brighter. It is also faster if you're doing many shirts. Just be careful, too early or too late can mess up the print. Knowing when to peel is key DTF printing terminology for smooth results.
13. Underbase
An underbase is the first layer of white ink under the colors in a DTF design. It’s good on dark shirts, so the colors stay bright and clear. Without it, colors might look dull or see-through after pressing. It’s one of those DTF printing terms explained that helps beginners avoid dull prints.
14. DTF Printer
A DTF printer is inkjet printer that prints right onto PET film using DTF inks. It prints color first, then white ink on top. Many DTF printers have a shaker and oven that puts on the powder on its own. It’s a must-have DTF printing equipment item for anyone serious about printing.
15. Heat Temperature and Pressure Settings
These need to be right for the transfer to stick to the fabric. Most DTF transfers are at 320°F (160°C) for 15–20 seconds with medium pressure. Different fabrics like cotton, polyester, or blends might need small tweaks to get it just right. Understanding this is part of DTF basics for beginners that ensures top-quality prints.
16. Stay Dry
Too much water can mess up your prints, making them look weird. Iron your clothes first, and keep your PET films in a dry place. If it's not too humid, your DTF prints will stick well and look professional. So, the term “stay dry” means to keep the environment moisture-free.
17. Give it a Stretch
Want to test your DTF print? Just stretch it! If it's good, it shouldn't crack or fade. It's a simple way to see if your print will last when people wear the clothes. This test is part of the DTF transfer process quality check.
18. Get Your Colors Right
Color profiling makes sure the colors you print look like what's on your computer screen. It tweaks the ink to get the colors spot-on. For bright reds and dark blacks, get your color profiles sorted. It’s an advanced DTF printing techniques tip to improve accuracy.
19. Pressing Time
Press time is how long the heat press is closed. Too short, and it won't stick; too long, and it'll melt. Usually, DTF press times are about 12–20 seconds, but it depends on the clothing. Keep this in mind when using DTF printing equipment regularly.
20. Storing Transfers
You can save DTF transfers for later if you keep them dry, flat, and out of the sun. This stops them from sticking or getting dusty. Then they’re ready to use for months! It’s one of the simplest DTF basics for beginners that keeps your workflow smooth.
Why Choose DTF Louisville for DTF Printing
At DTF Louisville, we are committed to bringing all the necessary tools, equipment, and expertise to help you start and grow your DTF printing business. From high-end DTF printers to ready-to-press DTF transfers for your custom apparel, we have everything under one roof to help you get started.
Want to start printing high-resolution DTF prints? Try our DTF Sample Pack now to put your creativity to test!
Frequently Asked Questions
Q: Is there any hope that DTF printing will not make the non-expert novices suffer?
A: Indeed, DTF printing for non-expert novices is a technology that is easy to use and it only requires a tiniest setup and printing area. A rapid learning curve permits anyone to get professional-looking prints on any fabric with no pre-treatment or high startup costs involved.
Q: Is there a need for a separate area for the DTF transfer process?
A: Not at all. Just a clean, dry, and well-ventilated area will serve the purpose. If you keep humidity under control and have organization, then you can expect the same quality prints, smooth heat pressing and curing, thus making DTF printing suitable for small scale or home-based printing.
Q: Does DTF printing offer print longevity ?
A: Color and print quality can be maintained for over 50 washes if applied properly. This durability is due to the correct use of settings, tools, and DTF printing techniques allowing small businesses or personal projects to produce long-lasting custom-made apparel.
Q: Can DTF be a solution for small orders or custom one-off designs?
A: Absolutely so, DTF printing is perfect for that of one-off and small batch projects. Since there are no setup costs and no minimums, you can print just the required quantities while still receiving high-quality, professional results.
Q: What mistakes do newcomers in DTF printing SHOULD avoid?
A: Newbies often choose wrong heat, pressure and curing settings. The right combination of temperature, press time and powder application prevents peeling, fading and poor adhesion thus ensures the durability, vibrancy and the professional quality of each application of DTF transfers.
Q: What kinds of fabrics are best for DTF printing?
A: DTF printing for beginners is not confined to one fabric type; it is suitable for all kinds of fabrics: cotton, polyester, blends, and even dark materials. This wide range of fabrics lets the beginners and the skilled ones have the audacity to make bold, long-lasting prints on any kind of garment without the need for pre-treatment or special materials.
Q: How do I store DTF transfers?
A: DTF transfers should be stored in a manner that they are flat, dry, and not exposed to sunlight or moisture. Proper storage will enable the adhesive powder to stay effective and the print colors to be vivid, thus, the transfer of design to fabric will be consistent.
Q: What specific DTF printing equipment do I need to begin with?
You'll need a DTF printer, a heat press, PET film, adhesive powder, and make sure you have good airflow. This stuff will help you get good prints that are cured right, and look pro. By choosing a reliable DTF printer to avoid the hassle and go straight to printing on t-shirts and other apparel.
Q: Can I use DTF printing for multi-colored or layered designs?
A: The DTF printing includes CMYK, white ink layers, and varnish printing in making a design with lots of colors. However, layering properly produces strikingly bright, rich colors with beautiful details, representing an elastic yet strong impression on various textiles. Inclusion of knowledge of DTF printing terminology helps the beginner practice proper layering.
Q: How to ensure DTF prints never come off from fabric or fade?
A: All the machines must be maintained in a manner to never heat the print at the wrong temperature or pressure during the DTF printing process. An information-based technical method on how to thicken ink for base, cure times, with all these temperature requirements, may promise more strainers with artistic-style prints having vibrancy.
Share:
4 Ways to Create Best-Selling Romantic T-Shirts with Valentine’s Day DTF Transfers
Valentine’s Day DTF Transfers: 5 Things Businesses Need to Do to Make More Sales