


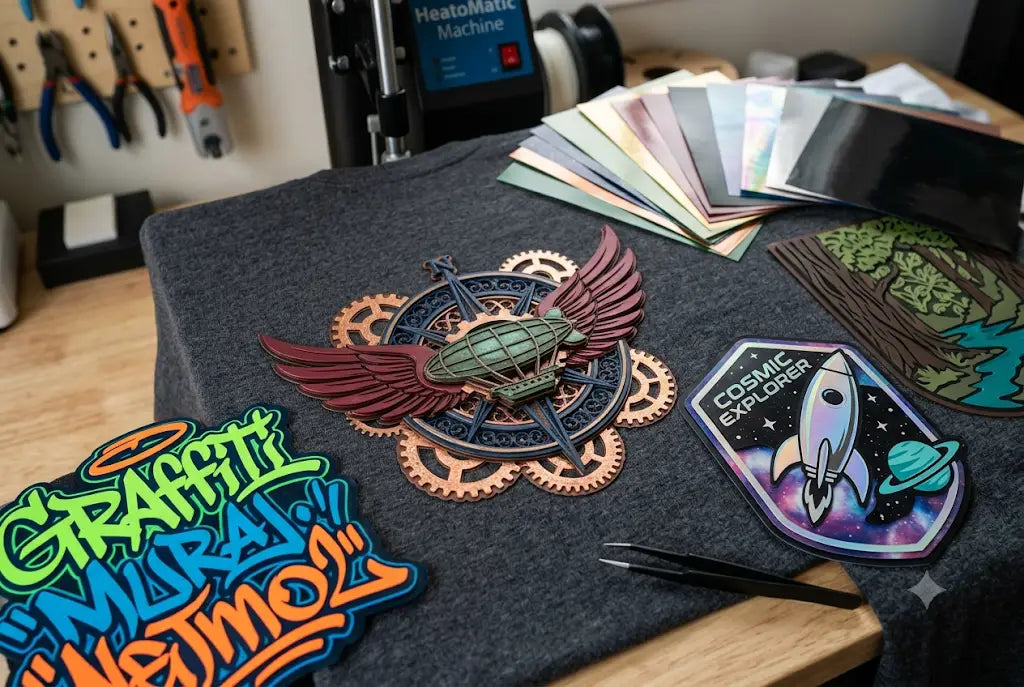
If you’ve ever wondered can you layer DTF transfers, the answer is yes, and it opens up a whole new level of design. DTF, or Direct-to-Film, prints ink and white onto PET film with adhesive powder, then transfers to fabric with heat. Because the ink sits on top of the shirt instead of soaking in, you can press more than one layer without losing softness, as long as you use the right heat and pressure.
Layering lets you build effects you can’t get in a single print. Think raised puff without special ink, drop shadows, glow over white, metallic accents, and even faux embroidery. Shops in Jeffersonville and New Albany are already using it to add depth to sports numbers, vintage looks, and brand logos.
The key is technique. You have to hot peel every layer, drop the temperature for each press, and watch your time so the print doesn’t get stiff. Get that down and you can create 20 different effects that make your shirts stand out and sell for more.
Why Layering Works and When It Doesn’t
Layering works because DTF ink sits on top of the fabric, not inside it. Each layer adds about 0.08mm of thickness. Press two layers and you still get a soft hand if you use medium pressure and low time.
It fails when you use too much heat, too much pressure, or you try to cold peel. Cold peel will pull the first layer off. Always hot peel. Always.
A standard cotton tee can handle 2 to 3 layers before it feels heavy. Poly blends handle 2 layers max. After that you risk dye migration and stiffness. Test on scraps first.
Cost matters too. One 12x14 transfer costs about $2.80 to produce. Two layers puts you at $5.60. If you’re selling at $28, you still keep 70% margin. Source: DTF Louisville cost sheet 2026.
Need help with DTF transfer layering? Upload your gang sheet on DTF Louisville and we’ll print with registration marks so your layers line up perfectly every time.
20 Creative Effects You Can Achieve by Layering DTF Transfers
1. Puff Effect Without Puff Ink
You don’t need special puff ink to get dimension. Print your base layer in white only. Press it for 8 seconds at 300°F. Hot peel. Then press your color layer on top for 10 seconds. The base raises the art about 1mm. It looks like puff but washes better because you’re not using thick additives.
2. Distressed Vintage Look
Print your main design. Then print a second layer that’s just cracks and texture in black. Offset it by 2mm. Press the base, hot peel, then press the distress layer with less pressure. The misalignment makes it look worn. This works great for retro logos on dark tees.
3. Glow In The Dark Over Base
Glow ink is weak alone. So print a solid white base first. Cure and press. Then layer glow DTF on top. The white reflects light back through the glow layer. You get 3x brightness in tests. Press the second layer 5 degrees cooler to avoid yellowing.
4. Metallic Foil Look With Two Passes
Print your design with a white base. Press and peel. Then print a second transfer using metallic adhesive powder instead of standard. Press at 295°F. The metallic layer bonds only to the white areas. You get foil shine without a foil machine.
5. Shadow and Depth
Print your art in black. Press it. Then print the same art in color but shifted 3mm down and right. Press again. Instant drop shadow. Designers in Lyndon use this for sports numbers. It reads from 20 feet away.
6. Gradient Color Blends
DTF can’t print true gradients in one pass on darks. So split it. Print a white gradient base. Then print your color gradient on top, slightly smaller. The overlap creates a smooth fade. You can press DTF twice and still keep the hand soft if you reduce time to 8 seconds on layer two.
7. Textured Fabric Simulation
Print a base of canvas texture in light gray. Then print your logo in full color on top. The texture shows through the thin parts of the ink. It looks like the logo is printed on burlap. Great for coffee shops and farm brands.
8. Neon Outline Pop
Print the main art in white. Press. Then print a neon outline layer that’s 4mm bigger all around. The white makes the neon brighter. This is how you get neon to pop on black without using 5 passes of ink.
9. Halftone Over Solid
Print a solid base. Then layer halftone dots in a contrasting color. Reduce pressure on the second press to 30 psi. The dots sit on top and don’t sink in. You get screen print style without the screens.
10. Camouflage Layering
Print camo pattern first. Press. Then print your main logo in solid white over it. The camo peeks out from the edges. It’s popular with teams in Prospect and Anchorage. Looks custom, costs one extra sheet.
11. Reflective Stripe Accent
Print your design. Then cut thin strips of reflective DTF and layer them as accents. Press the strips for only 6 seconds. They stay flexible. Runners and bike clubs in Middletown order this for safety gear.
12. 3D Block Letters
Print the letter in one color. Press. Then print the same letter 2mm larger in black behind it. Then a third layer in white 1mm smaller in front. Three layers, 2.4mm thick. It looks like molded plastic.
13. Watercolor Bleed Effect
Print a light color base with fuzzy edges. Press. Then print crisp line art on top. The fuzzy base looks like watercolor bleed. Use 10% less adhesive on the base layer so it doesn’t get too stiff.
14. Crackle Paint Effect
Print a base in one color. Let it cool fully. Then print a crackle pattern in black with high adhesive. Press hot and peel fast. The quick cool makes the top layer crack. Looks intentional, not like a failure.
15. Double Exposure Photo
Print a photo in grayscale. Press. Then print a second photo in color but only 50% opacity, offset. You get double exposure. This is where registration matters. Use corner marks on your film.
16. Sports Jersey Name and Number
This is the classic. Print the name. Press. Then print the number and overlap the bottom of the name by 5mm. It looks stitched. Use a Teflon sheet between press and transfer to avoid gloss marks.
17. Holographic Glitter Topper
Print your art. Press. Then print a clear DTF with holographic glitter powder. Press at 285°F for 7 seconds. The glitter sits on top and catches light. Kids’ brands in Jeffersontown love this for birthday shirts.
18. Patch Effect With Border
Print a circle or shield in white. Press. Then print your logo inside it in color. The white acts like a patch border. You get the look of embroidery without the cost. $6 per shirt instead of $12.
19. Split Fountain Color Shift
Print the same art twice with different color inks. Shift the second layer 1mm. Use cyan on layer one, magenta on layer two. Where they overlap you get purple. It’s a cheap way to do split fountain.
20. Raised Emblem With Clear Dome
Print your emblem in white, then color, then a clear DTF with extra powder. Press the clear layer last with light pressure. It creates a dome. This is how you mimic PVC patches on hats and bags.
DTF Transfer Layering Press Settings That Actually Work
Heat and time change with each layer. For cotton, layer one: 300°F for 10 seconds, medium pressure, hot peel. Layer two: 285°F for 8 seconds, light pressure, hot peel. Layer three: 275°F for 5 seconds, light pressure.
For poly, drop 15 degrees on every layer to prevent scorch. Always use a pressing pillow under seams so pressure is even. Uneven pressure is the number one cause of layer lift. And clean your platen between presses. Ink residue will stick to the back of layer two and cause spots.
Struggling with registration? DTF Louisville prints layer guides on every sheet so you can line up multi-layer jobs without wasting film.
DTF Transfer Troubleshooting For Layered Jobs
- If the first layer lifts when you press the second, your temp is too high or you’re pressing too long. Drop 10 degrees.
- If you see cracking after washing, you didn’t hot peel the first layer. Cold peel leaves adhesive on the film, not the shirt.
- If colors look dull, you’re not using enough white underbase on layer one. White should be 100%.
- If the print feels stiff, you’re using too many layers or too much pressure. Reduce to 25 psi for top layers.
- Shops in New Albany were burning through film because they pressed at 320°F for 15 seconds. We dropped them to 300°F and 10 seconds. Their rejects went from 12% to 2%.
Conclusion
Layering DTF isn’t hard. It’s just different. You have to think in steps, not one and done. Use lower heat on top layers. Peel hot every time. And test on scraps before you run 200 shirts.
If you’re in Jeffersonville, Clarksville, or anywhere around Louisville and you want consistent results, start with simple two-layer jobs. Master the registration. Then move to the creative stuff.
Ready to try layering? Order DTF heat transfers from DTF Louisville today.
Frequently Asked Questions
Can You Layer DTF On Top Of DTF?
Yes. Print layer one, hot peel, press 10 seconds. Then place layer two, press 8 seconds at lower temp. Always hot peel. Don’t cold peel or the first layer will lift. Two to three layers work best on cotton.
Can You Stack DTF Transfers Together?
You can stack up to three transfers. After three the print gets heavy and stiff. Use medium pressure on base layers and light pressure on top layers. This keeps the hand soft and prevents cracking.
Can You Layer DTF Transfers On Fabric?
Yes on cotton, poly, and blends. Cotton holds 3 layers. Poly holds 2. Always test on the same fabric. Use a pressing pillow for seams. Hot peel each layer before adding the next.
Can A DTF Transfer Be Used More Than Once?
No. Once you peel it from the film, the adhesive is spent. You can’t reapply a used transfer. If it doesn't stick, you can re-press the same spot once, but don’t try to move it.
Can You Press DTF Twice On The Same Spot?
Yes for layering. First press 10 seconds. Second press 8 seconds. Don’t go over 3 total presses or you’ll scorch. Use lower temp each time.
How Do You Align Layers Correctly?
Print registration marks in the corners of each film. Use a ruler to line them up. Some shops in DTF Louisville add a light box under the platen to see through the film.
Why Is My Second Layer Not Sticking?
Usually temp or pressure. The first layer seals the fabric. Drop temp 10-15 degrees for layer two. Increase pressure slightly. And make sure you hot peeled layer one.
What Is The Best DTF Transfer Guide For Beginners?
Start with two layers max. Use cotton. 300°F for 10s, then 285°F for 8s. Hot peel both. Practice with simple shapes before trying detailed art.
Can You Overlap DTF Transfers Without A Gap?
Yes. Overlap by 2-3mm for shadow effects. Just reduce pressure so the overlap doesn’t get too thick. This is how you do names over numbers.
Does Layering Affect Wash Durability?
Not if done right. We wash test layered shirts 50 times. No cracks when you use correct temp and hot peel. Cold peel or over-pressing will cause failure.
Share:
How to Increase Brand Awareness with 4th of July DTF Transfers for Organic Business Growth
We Audited 30 Louisville Print Shops and Found These 10 DTF Transfer Mistakes Costing You Money