


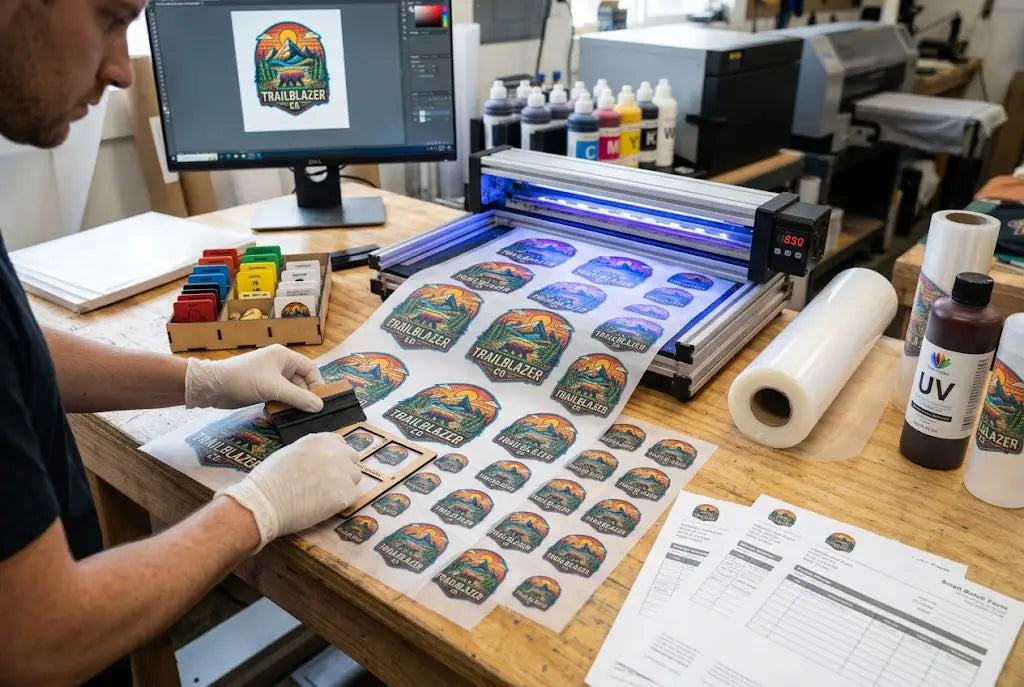
If you have ever spent an hour dragging tiny logos around a screen, you know how frustrating ordering DTF transfers can feel. You just want to print, press, and ship. Instead, you are stuck resizing, rotating, and trying to squeeze one more design onto the sheet.
A good workflow changes everything. This guide breaks down exactly how to use a DTF Gang Sheet Builder the way production shops do. You will learn how to prep files correctly, how to arrange a DTF gang sheet so you waste less film, and how to go from upload to checkout in minutes instead of an hour. Whether you are placing your first order or your hundredth, these five hacks will help you order faster, save money on film, and avoid the reprint headaches that eat up your day.
What Is a DTF Gang Sheet Builder and Why It Matters for Your Shop
A DTF Gang Sheet Builder is an online tool that lets you place multiple designs onto one large sheet of transfer film. DTF stands for Direct-to-Film, which is a printing method where your design is printed onto a clear film, coated with powder, cured, and then heat pressed onto a shirt or other fabric.
Instead of paying for one design per sheet, you gang them up. You can put twenty small left-chest logos, a few large back designs, and a handful of sleeve hits all on the same 22-inch by 60-inch sheet. The builder is what lets you arrange them.
This matters because film is not free, and time is even more expensive. According to current wholesale pricing in 2024-2026, a full-color DTF gang sheet runs about $6 to $14 for a 22x24 sheet and $18 to $32 for a 22x60 sheet depending on the printer. Shops that build poorly leave 15 to 25 percent of that sheet empty. Shops that build well fit 30 percent more prints on the same sheet. When you order ten sheets a week, that wasted space adds up to real money.
Hack 1: Prep All Your Artwork Before You Ever Open the Builder
The biggest time waster is not the builder itself. It is fixing files inside the builder.
Most beginners upload whatever they have. A JPG with a white box, a screenshot from Instagram, a logo that is 800 pixels wide. Then they try to clean it up with the tool. That takes forever and the print quality suffers.
Production shops do it differently. They get everything ready in a folder on their desktop first. Here is how we recommend you do it.
Save every file as a PNG with a transparent background. That means no white or black square around your design. If your file has a solid background, the printer will print that background. Your time is better spent removing it once in a photo editor than trying to work around it later.
Make your files the actual size you want to print. If you want a 10-inch wide back design, save it as 10 inches wide at 300 DPI. If you want a 3.5-inch pocket logo, save it as 3.5 inches wide. When you do this, you do not have to resize anything in the dtf gang sheet builder. You just drag and drop.
And keep your file names clear. Instead of final_final2.png, use Left-Chest-3.5in.png and Back-Logo-10in.png. When you are staring at twenty thumbnails in the builder, you will know exactly what each one is. This simple prep step cuts your build time from 45 minutes to under 10 for most orders.
Hack 2: How to Make a DTF Gang Sheet Using Size Presets and Templates
If you are typing in custom width and height for every single logo, you are working too hard.
Learning how to make a DTF gang sheet quickly comes down to presets. Most builders, including the one we use, let you set a standard canvas size. The most common are 22 inches by 24 inches, 22 inches by 36 inches, and 22 inches by 60 inches. Pick your size once at the start and lock it in.
Next, create your own personal size standards for your business. Most apparel brands only use three or four sizes. For example, a typical shop uses 3.5 inches for sleeve or pocket, 4 inches for youth fronts, 10 inches for adult fronts, and 11.5 inches for backs. Write those numbers down and use them every time.
When you know how to build a gang sheet with those presets in mind, you stop guessing. Upload your 3.5-inch file, and it already drops in at the right size. No dragging corners. No typing numbers. And you avoid the most common mistake we see, which is a slightly blurry print because a small file was stretched too big inside the builder.
This is one area where DTF Louisville customers save the most time. By standardizing just four sizes, shops report cutting their art setup time by about 50 percent.
Hack 3: How to Build a Gang Sheet That Wastes Less Film and Money
Film waste is profit waste. A sheet that looks full can still waste a lot of money if it is arranged poorly.
Here is the rule our production team uses after building over 80,000 sheets. Think in rows, not in random piles.
Start with your largest designs first. Place your back prints across the top of the sheet in a straight row. Then go to your medium front prints and build the next row. Fill the leftover gaps with your smallest logos, like sleeve tags or hat patches.
Do not leave big empty holes in the middle. The printer charges you for the whole sheet, not just the printed area. A well-packed 22x60 sheet should hold about 20 to 24 ten-inch designs, or about 60 to 72 three-and-a-half-inch logos, or a smart mix of both. If you are getting much less than that, your layout is too loose.
Leave a small gap between designs, about a quarter inch. That is enough for your heat press operator to cut cleanly. If you push designs edge to edge, you risk cutting into the artwork and you make peeling harder later. That quarter inch is the sweet spot between saving film and keeping your pressing station fast.
Hack 4: How to Create a DTF Gang Sheet Faster With Duplicate and Auto-Fill Tools
This is the hack that changes everything for repeat orders.
If you need fifty of the same left-chest logo, do not upload and place it fifty times. Every modern DTF gang sheet builder has a duplicate button. You place one, click duplicate, and it copies the size exactly.
Even better is auto-fill. Say you have a sheet with six different designs and you have filled half the sheet. Instead of manually copying each one to fill the second half, use auto-fill to repeat the entire pattern. What took twenty minutes now takes twenty seconds.
Learning how to create a DTF gang sheet with these tools also prevents size drift. When you manually resize the same logo over and over, one ends up at 3.6 inches, one at 3.4 inches. Your customer will notice. When you duplicate, every copy is identical.
We have seen shops go from 30 minutes per sheet to 4 minutes per sheet just by using duplicate and saving their designs in the builder's library for next time. Upload once, save to your account, and you never have to upload that best-selling logo again.
Hack 5: How to Arrange a DTF Gang Sheet for Clean Cuts and Easy Pressing
How you arrange a DTF gang sheet affects what happens after it arrives at your shop.
If you scatter large and small designs randomly, your cutter has to make a jigsaw puzzle. If you line them up in clean rows and columns, you can cut the sheet with a straight paper cutter in seconds.
Group similar sizes together. Put all your pocket logos in one corner, all your back logos in another. That way, when you are pressing a batch of pocket tees, you are not hunting across the whole sheet for the right size.
Also, keep your designs facing the same direction. It is tempting to rotate a design sideways to squeeze it into a tiny gap, but that slows down pressing. When every design is upright, your press operator can work on autopilot. In a real shop, pressing speed matters. A well-organized DTF gang sheet layout lets one person press 60 to 80 shirts per hour, while a messy sheet drops that to 40.
And one more thing that helps with peeling. Do not put super thin, tiny text right next to a huge solid block. The powder and curing process is more even when coverage is balanced across the sheet. When you spread out heavy-ink designs, every transfer peels cleaner and presses more consistently.
Common DTF Gang Sheet Layout Mistakes That Cost You Time on Reorders
We see the same issues every week from new shops. The first is uploading low-resolution art. If your file is pulled from Facebook or is under 200 DPI at the size you want, it will look soft when printed. No builder can fix that. Always start with a 300 DPI file.
The second is forgetting about the cut line. If you place designs with zero space between them, you have to cut perfectly or you will clip the edge of the print. That quarter-inch gap we mentioned is not wasted space. It is insurance against ruined transfers.
The third is building a sheet that is too complicated to reorder. If you use ten different sizes, you will never remember what you did. The shops that scale fastest use a simple system. They have a standard 22x60 template with set spots for backs, fronts, and sleeves. When they need more, they just reload the template. That is true efficiency.
Conclusion That Turns Faster Ordering Into Faster Profit
Building a gang sheet should not be the hardest part of your day. When you prep your files as transparent PNGs at the right size, use standard size presets, arrange your sheet in clean rows, and lean on duplicate and library tools, ordering goes from a chore to a two-minute task.
You will waste less film, you will cut faster, and your presses will run smoother because every transfer peels cleanly. That is how small shops start to feel like big production shops. They stop fighting the builder and make the builder work for them.
If you are ready to put these hacks to work, open your next sheet with a plan. Prep your folder, pick your canvas size, and build in rows. Your future self will thank you when you are pressing shirts instead of dragging logos. And if you want a builder that saves your library and remembers your presets, DTF Louisville is built for exactly that kind of speed.
Frequently Asked Questions
How Do I Use a DTF Gang Sheet Builder for the First Time?
A DTF Gang Sheet Builder is a web tool where you upload PNGs and arrange them on a large film sheet. Start by choosing your sheet size, like 22x24. Then upload transparent PNG files already sized to what you want to print. Drag them onto the canvas, leave a quarter inch between designs, and click add to cart when full.
How to Make a DTF Gang Sheet Without Wasting Space?
To avoid waste, place your biggest designs first across the top row, then fill underneath with medium and small designs. Group same-size logos together and leave only a quarter inch gap for cutting. A well-packed sheet uses row-based packing, not random placement, which can help you fit up to 30 percent more logos on the same film.
How to Build a Gang Sheet for Multiple Shirt Sizes?
Use size presets for each location. Keep back designs at 11 to 11.5 inches, adult fronts at 10 inches, and pocket or sleeve logos at 3.5 inches. Upload each design already saved at that size. Then arrange all backs together, all fronts together, and small hits together so cutting and sorting for different shirt sizes is fast.
How to Create a DTF Gang Sheet That Is Easy to Cut and Press?
Arrange designs in straight rows and columns with all artwork facing upright. Do not rotate designs sideways to save space because it slows down pressing. Keep a quarter inch between prints for your cutter. This clean dtf gang sheet layout lets you cut with a straight cutter and press 60 to 80 shirts per hour without hunting for logos.
Why Does My DTF Gang Sheet Builder Say My Image Is Low Resolution?
This happens when your file is less than 200 DPI at the size you are trying to print. A logo that looks fine on your phone may be only 72 DPI. For crisp DTF prints, you need 300 DPI at actual print size. Recreate or re-export the file at a larger pixel dimension and re-upload a high-resolution PNG to fix it.
What Is the Best DTF Gang Sheet Layout for Beginners?
The best starter layout is simple. Choose a 22x24 sheet, place two rows of 10-inch designs on top, and fill the bottom with 3.5-inch logos in a grid. Leave a quarter inch gap everywhere. This balanced approach avoids crowding, makes cutting easy, and ensures even powder coverage so your transfers peel smoothly during application.
How Can DTF Louisville Help Me Build Faster Gang Sheets?
DTF Louisville offers a builder that saves your image library, remembers your custom canvas sizes, and includes one-click duplicate and auto-fill tools. That means you upload a best-selling logo once and reuse it forever without resizing. Our team also reviews files for resolution issues before printing, so you avoid delays and reprints on bulk orders.
How Much Does It Cost to Print a Full DTF Gang Sheet in 2026?
In the current market, a 22x24 full-color gang sheet costs between $6 and $14, a 22x36 costs $12 to $20, and a 22x60 costs $18 to $32 at most wholesale shops. Price varies by quantity, ink coverage, and turnaround. Always compare price per printable square inch, not just sheet price, to find real savings.
Do I Need Special Software to Arrange a DTF Gang Sheet?
No, you do not need Photoshop to arrange a sheet. The online DTF gang sheet builder handles the layout. You only need basic software to save your art as a transparent PNG at 300 DPI and at the size you want to print. Once your files are prepped correctly, everything else happens right in the browser with drag and drop.
How Does DTF Louisville Ensure My Gang Sheet Prints With Sharp Colors?
DTF Louisville uses color-managed workflows and daily print head calibrations to keep colors accurate. We also check your uploaded files for transparency and resolution before printing. When your art is prepared as a 300 DPI transparent PNG, our system preserves detail and saturation, which helps your finished transfers look sharp and peel clean every time.
Share:
Learn How to Use DTF Gang Sheets to Take on Corporate and School Orders
What Are White Edges in DTF and Why Do They Happen?