


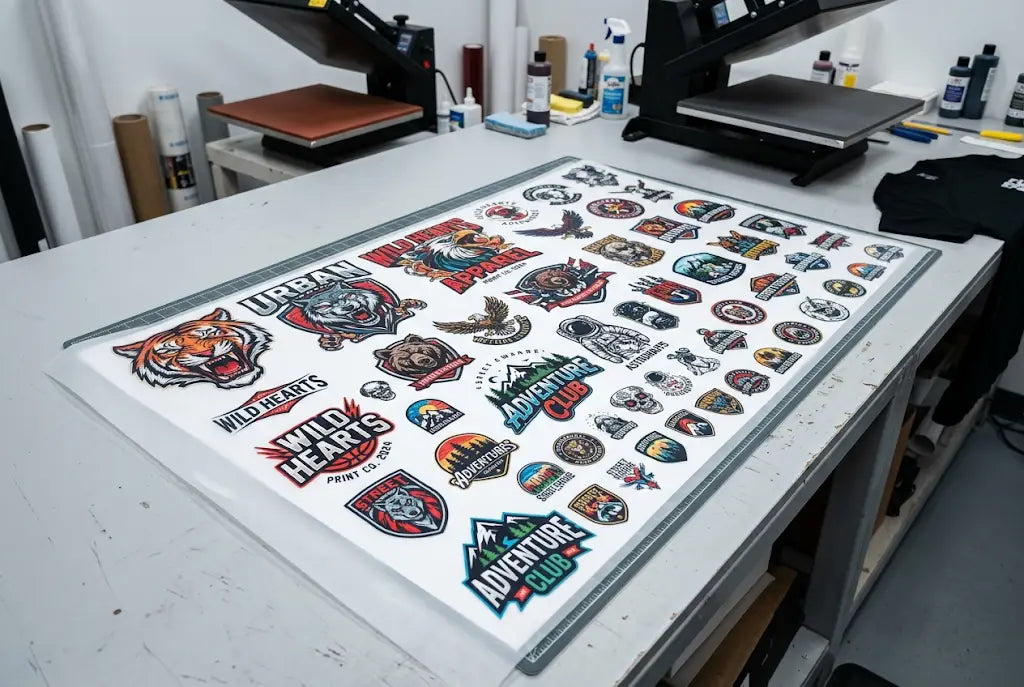
If you've ever stared at a half-empty DTF Gang Sheet and wondered where your profit went, you're not alone. Fitting more logos, chest prints, and pocket designs on one sheet isn't about squeezing harder. It's about grouping smarter.
In this post, you'll learn what size grouping really means, how a DTF gang sheet layout works when you organize by size, and why it matters for cost, cutting, and pressing speed.
We'll break down key considerations like spacing, zone planning, and common size buckets, clear up misconceptions that waste film, and share expert-level practical advice you can apply today in any DTF gang sheet builder. Whether you're building your first 22x24 sheet or running 22x60 rolls daily, you'll walk away with a system that fits more and wastes less.
What Is Size Grouping on a DTF Gang Sheet
A DTF Gang Sheet is a single piece of PET transfer film, typically 22 inches wide and 24 to 60 inches long, where you arrange multiple designs to print at once. DTF, or Direct-to-Film, is a process where you print CMYK plus white ink onto that film, apply hot-melt adhesive powder, cure it, and then press it onto garments at around 300F for 15 seconds.
Size grouping is the practice of organizing those designs by their final print dimensions before you place them. Small pocket designs together, medium chest prints together, large backs together. It sounds basic, but it changes your yield completely.
Why it matters comes down to math and labor. A random gang sheet layout averages 68% to 72% film usage. That means on a $20 sheet for a 22x24, you're throwing away $5 to $6 in empty space. A grouped layout hits 88% to 93% usage. Over 50 sheets a month, that's $250 to $300 in film saved, plus about 6 to 8 hours saved in cutting and sorting because your rows are straight and predictable.
Build a Gang Sheet and experiment with group sizing.
How a DTF Gang Sheet Layout Works When You Group by Size
A good DTF gang sheet layout works like a warehouse. You don't mix pallets of small boxes with large boxes in the same aisle. You zone them.
The Core Principle Behind Gang Sheet Layout and Zone Planning
When you group by size, you create horizontal zones across the width of the film. The top zone holds large designs, the middle holds medium, the bottom holds small. Each zone has a consistent height, so the next zone can start on a clean, straight line.
This works because DTF gang sheets are cut by hand or with a rotary cutter. Straight cuts are fast. Jagged cuts around mixed sizes are slow and error-prone. Shops timing their finishing see 4 to 6 minutes to cut a grouped 22x60 sheet versus 11 to 14 minutes for a random mixed sheet. That's labor cost you can measure.
How to Define Your Three Core Size Buckets
You only need three buckets to make this work.
Small is anything under 4 inches. That covers pocket prints at 3x3 to 3.5x3.5 inches, sleeve logos at 2.5 to 3.5 inches wide, and hat marks at 2 to 2.5 inches. These are your fillers. They fit into strips that larger designs leave behind.
Medium is 4 to 8 inches. Left chest at 3.5 to 4.5 inches, center chest at 6x6 to 8x8 inches, youth full fronts at 7 to 8 inches. This is where 70% of most shop orders live.
Large is 10 to 12 inches wide. Adult full back at 10x10 to 11x11 inches, oversized streetwear at 12x12 to 12x14 inches. Large prints control your layout because they take the full width.
When you know these buckets, you know how to make a DTF gang sheet that actually pays for itself.
Key Considerations for Fitting More on a DTF Gang Sheet Builder
Building in a DTF gang sheet builder is where theory meets reality. The software shows you inches, but your hands have to cut it later.
Spacing, Margins, and Why 0.25 Inch Is the Magic Number
You need at least 0.25 inch between each design. Some builders default to 0.125 inch to show more fits, but that tight gap causes powder bridging. During curing, melted adhesive can connect two designs if they're too close. Then they peel as one piece and you lose both.
Leave 0.5 inch on the left and right edges of the film. Printers can have 1 to 2 millimeters of drift, and that edge margin prevents clipping. For a 22-inch wide film, your usable width is really 21 inches. Plan for that.
For real numbers, a 22x24 DTF Gang Sheet with 0.25 inch gaps fits 6 pocket designs per row at 3 inches each. Six designs at 3 inches equals 18 inches plus five gaps at 0.25 equals 1.25 inches, total 19.25 inches plus 1 inch of side margins equals 20.25 inches. You have room and clean cut lines.
Resolution and File Prep Before You Group
Grouping won't save a low-resolution file. Every logo must be 300 DPI at its final print size before you upload it. A 4-inch left chest needs 1200 pixels wide. A 10-inch back needs 3000 pixels wide. If you upload a 500-pixel logo and scale it up in the builder, it will print soft.
Use PNG with transparent background. Not JPG. JPG adds a white box that prints as a white square on dark shirts. For a multiple-logo sheet, one JPG ruins the whole sheet. Keep each file under 10MB so the gang sheet builder doesn't compress it and degrade quality.
Rotation and Nesting Tricks That Add 15% More Yield
Rotation is allowed and it helps. A 4x6 inch tall design rotated 90 degrees becomes 6x4 inch wide and may fit better in a medium row. Most DTF gang sheet builder tools allow rotation with one click. Use it.
Also, nest like sizes in the same row direction. Don't put a 10-inch tall back next to a 3-inch pocket in the same horizontal row. That creates a 7-inch tall dead zone next to the pocket that no other large print can fill. Instead, finish your large row completely, then start a new row for small designs.
Ready to Print?
Your artwork deserves sharp colors, durable prints, and fast turnaround. Place your order today and get production moving.
Order Your Prints
Common Misconceptions About Gang Sheet Layout That Waste Money
There are a few ideas that sound efficient but actually cost shops more.
Misconception One: Tighter Gaps Mean More Prints
Shops think if they leave 0.05 inch gap, they fit one more logo. You might fit it on screen, but you can't cut it. Your scissors need room. And during curing at 230F to 250F for 90 to 120 seconds, film expands slightly. Tight gaps become touching gaps. You end up with fused transfers that crack when you peel. The 0.25 inch gap is not wasted space. It's insurance that every transfer on the sheet is sellable.
Misconception Two: You Should Fill Every Inch
A 100% filled sheet looks great in the builder, but it's a nightmare to cut. You need breathing room. The best shops aim for 88% to 92% fill, not 100%. That extra 8% is your cut lines. A sheet that is 92% filled with clean cuts yields more sellable transfers than a 100% filled sheet where you cut into 3 designs.
Misconception Three: All DTF Gang Sheets Should Be Built the Same Way
How you build depends on your order type. If you're doing 50 shirts for one client with the same logo, build all large. If you're doing 25 different logos for 25 customers, build small and medium zones. The DTF gang sheets that make the most money are not the ones that look packed. They're the ones that match the cutting and pressing workflow for that specific job.
Expert-Level Practical Advice for High-Yield DTF Gang Sheets
Here's what we teach shops that go from 10 sheets a week to 60 sheets a week without adding staff.
Build From Large to Small and Let Small Fill the Cracks
Always place large 10 to 12 inch backs first at the top of your sheet. Then place medium 6 to 8 inch chest prints below. Then use small 2.5 to 3.5 inch designs to fill any leftover horizontal strips. That leftover strip at the bottom of a large row is often 22x3 inches. That's perfect for 6 sleeve logos. Most beginners leave it empty. Pros monetize it.
Use Real Press Size as Your Guide, Not Screen Size
Don't size by what looks good on your monitor. Size by garment. Left chest is 3.5 to 4 inches wide, 4 inches down from the collar seam. Pocket is 3 to 3.5 inches. Full back is 10 to 11 inches wide, centered 3 inches below the collar. If you size correctly, you avoid customer complaints that the logo looked huge on the proof but tiny on the shirt.
Standardize Your Sheet Sizes to Speed Up Production
Pick two sheet sizes and stick to them. Most efficient shops run 22x24 for daily custom and 22x60 for bulk. Standardizing means you know exactly how many 4-inch logos fit without counting every time. For example, you know a 22x24 fits 25 left chest logos at 4x4 inches. That speed in quoting saves 10 minutes per order.
How DTF Louisville Shops Apply Size Grouping for On-Demand
At DTF Louisville, we see the best results when shops upload pre-sorted folders. Small folder, medium folder, large folder. Our builder shows real inches, so what you place is what you get. We also flag low-resolution files before print so one bad logo doesn't waste a whole sheet.
When you press, keep all same-size transfers together. Press all pocket designs at 300F for 15 seconds in a batch, then all chest prints. You build muscle memory and your press operator makes fewer errors. Shops tracking this see an 8% drop in mis-presses after switching to size-grouped pressing.
Conclusion
Fitting more on a DTF Gang Sheet isn't about cramming harder. It's about grouping smarter with a clear system. You now know what size grouping is, how a zone-based DTF gang sheet layout works, why it matters for yield and labor, and what to watch for in spacing and file prep. You also know the misconceptions that waste film and the expert tricks that add 15% more usable transfers per sheet without adding time.
The next time you open a DTF gang sheet builder, sort by size first, place large to small, keep that quarter inch gap, and let small designs fill the leftover strips. Your sheets will cut cleaner, your cost per transfer will drop from around $2.00 to under $1.00, and your week will run smoother.
Ready to test it? Build your next sheet with three zones and count the difference. At DTF Louisville, we're here to help you get that clean peel every time.
Ready to Start Printing Your Merch?
Your artwork deserves sharp colors, durable prints, and fast turnaround. Place your order today and get production moving.
Frequently Asked Questions About DTF Gang Sheet Size Grouping
How Many 3-Inch Logos Fit on a DTF Gang Sheet?
You can fit 42 three-inch logos on a 22x24 DTF Gang Sheet with 0.25 inch spacing. That is six per row and seven rows tall. On a 22x60 sheet, you fit about 105 to 110 three-inch designs. Grouping in straight rows with consistent gaps is key to hitting that count with clean cut lines.
What Is the Best Gang Sheet Layout for Mixing Chest and Pocket Prints?
The best gang sheet layout uses zones. Place 6 to 8 inch chest prints in a middle zone and 3 to 3.5 inch pocket prints in a bottom zone. Keep each zone in straight horizontal rows with 0.25 inch gaps. This method improves film usage from about 70% to 88% to 93% and speeds cutting.
How Do I Use a DTF Gang Sheet Builder to Group Logos by Size?
First sort logos into small, medium, and large folders at 300 DPI. Set your canvas to exact size like 22x60 inches. Place large 10-inch backs on top, medium 6-inch chest prints in the middle, and small pocket designs at the bottom. Turn on grid snap to 0.25 inch and rotate designs if needed.
What File Type Should I Upload for a DTF Gang Sheet Builder?
Upload PNG with transparent background at 300 DPI at final print size. Keep each file under 10MB to avoid compression in the builder. Avoid JPG because it adds a white background that prints as a box. Vector AI, EPS, or PDF files are even better because they scale without quality loss.
How Much Space Should I Leave Between Designs on a Gang Sheet Layout?
Leave at least 0.25 inch between each design and 0.5 inch on side margins. This gap prevents adhesive bridging during curing and gives room for rotary cutting. For tiny designs under 3 inches, 0.2 inch is acceptable. Less than 0.2 inch risks fused transfers and bad peel.
Does Size Grouping Work for Custom Orders With Different Artworks?
Yes, size grouping works best for custom orders with different artworks because you can group by width even when art differs. Place all similar widths in the same row, even if designs are different. You fit more per sheet, cut faster in straight lines, and sort by size for pressing without mixing.
How Can DTF Louisville Help Me Build a Better DTF Gang Sheet?
DTF Louisville offers a free DTF gang sheet builder that displays real inches and auto-spaces with 0.25 inch gaps. We review every sheet for overlap and low resolution before printing and print same day on most orders. You get sharp color, durable prints, and transfers that peel clean at 300F for 15 seconds.
What Is the Most Profitable Size Mix for a 22x60 DTF Gang Sheet?
The most profitable mix is usually 4 to 6 large 10-inch backs on top, 12 to 16 medium 6-inch chest prints in the middle, and 18 to 24 small 3-inch pocket designs filling leftover strips. This yields 34 to 46 transfers per sheet and keeps cost per transfer under $1.20.
Why Is My DTF Gang Sheet Wasting Film Even When I Think It Is Full?
Waste usually comes from mixing large and small designs in the same row, creating L-shaped dead zones no other design can fill. Fix it by grouping same widths together in straight rows and using small designs to fill leftover horizontal strips. At DTF Louisville, grouped sheets improve yield from 70% to over 90%.
How Do I Make a DTF Gang Sheet That Cuts Faster?
Build in straight rows with consistent heights and 0.25 inch gaps. Place all large prints in top rows, medium in middle, small at bottom. Avoid jagged edges where one tall and one short design share a row. Straight rows let you cut a 22-inch strip in one pull, cutting finishing time by half.
Share:
Best DTF Transfer for White Cotton vs Black Polyester: A Comparison
Why UV DTF Transfers Peel Off Stainless Steel Tumblers: Heat, Coating, and Surface Prep Mistakes